To begin the second feature of our How-To-Series, I want to enquire if you know the benefits of ear wax?
This is because people are usually surprised to learn the significance of the greasy, oily substance inside their ears. Not only does it help prevent infections, but it also stops the ear from becoming dry and crusty. It truly is fantastic stuff, which is why you need to tell your family and friends to stop poking cotton buds inside their ears.
But that doesn’t mean that you can’t have too much of a good thing – and for hearing aid users, ear wax can sometimes be problematic. This leads to my next question: did you know that ear wax accumulation is the main cause of hearing aid repairs and replacements? If a build-up of ear wax gets into your hearing aid, the sound quality will drop, or in the worst scenario, your hearing aid will stop working altogether.
But not to worry everyone, there is a solution to prevent such a calamity, and that solution is known as a wax filter.
What is a wax filter?
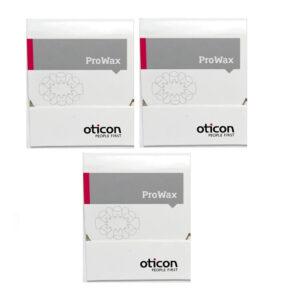
Wax filters are miniature, plastic screens that keep ear wax out the speaker/ receiver. All hearing aids will come with a wax filter unless they have a mould and a tube.
But before all else, something needs to be clarified. If your audiologist calls them wax traps, your dad calls them wax guards and your gran calls them wax filters, please know that they are all referring to the same thing. I just wanted to clear up any confusion there. The same goes with hearing aid brands too: filters, traps and guards are all the same terminology.
Where is it located?
For In-the-Ear (ITE) hearing aids, the wax filter is located inside the hearing aid.
For Receiver-in-the-Ear (RITE) and Behind-the-Ear (BTE) hearing aids, it will be in the speaker or mould.
When do I need to change my wax filter?
This depends entirely on personal use and ear wax build-up. For this reason, it is difficult to provide a definitive answer. Most patients will change their wax filter every 3-4 weeks, yet for others it could be fortnightly or every other month.
The best advice I can provide is to monitor your own ear wax production, and you can do this every time you clean your hearing aid (we recommend this every night). If your wax filter is clogged, you will know that it is time for a change.
How do I remove my wax filter?
These steps will work for many hearing aids. However, if your hearing aid has a dome, you will need to take this off before changing your wax filter. To remove your wax filter, follow this simple 3-step process:
- A new wax filter will typically come mounted to the end of a tool that looks like a stick, and on the other end of the tool, you will have a pin.
- Remove the tool from the package and push the pin into the used wax filter.
- Gently pull the tool until the used filter is released.
How do I replace my wax filter?
After the used filter has been removed, you will need to insert the new filter.
- Use the tool to place the new filter into the speaker/ receiver.
- Remove the tool, and the new filter should be securely housed in your hearing aid ready for use.
Hopefully you will now feel more confident about changing your wax filter (if you haven’t already!) But if you do still feel unsure, please contact our sister company and trained audiologists Hear4U or get in touch with our friendly customer service on 01455245749. We’re always here to help!